
| 일 | 월 | 화 | 수 | 목 | 금 | 토 |
|---|---|---|---|---|---|---|
| 1 | 2 | 3 | 4 | |||
| 5 | 6 | 7 | 8 | 9 | 10 | 11 |
| 12 | 13 | 14 | 15 | 16 | 17 | 18 |
| 19 | 20 | 21 | 22 | 23 | 24 | 25 |
| 26 | 27 | 28 | 29 | 30 |
- Kotlin
- swagger
- 코틀린
- front-end
- kafka
- component
- It
- restful api
- 조건문
- 개발이취미인사람
- 개발자
- Sequelize
- back-end
- vue
- java
- 개발이 취미인 사람
- react
- state
- props
- 반복문
- spring boot
- jpa
- SWIFT
- Producer
- AWS
- file upload
- node.js
- javascript
- 상속
- Nest.js
- Today
- Total
개발이 취미인 사람
[Swagger] Node.js Swagger API 문서화 본문
- 개요
안녕하세요. 이번 시간에는 Node.js API 서버에서 Swagger를 활용한 문서화 작업을 해보는 시간을 가져보도록 하겠습니다.
기본적으로 프론트 앤드와 백앤드 개발자가 작업을 할 때 가장 많이 협업하는 부분은 아무래도 클라이언트와 서버 간에 통신 부분입니다.
예전에는 git이나 구글 doc, wiki 등 텍스트 문자를 통해 API 문서를 정의해 공유했습니다. (보기가 불편하다는 단점이 가장 큰 것 같아요..)
최근에는 Postman을 통해 API를 정의하고 공유하는 방식도 많이 사용합니다. 하지만 우리 API 서버 정보가 Postman 서버에 저장되기 때문에 또 다른 문제가 발생합니다...
이러한 문제를 Swagger를 활용해 자체 API 서버에 연결을 한다면 해결이 가능합니다. 하지만 항상 장점만 있는 건 아니겠죠?
기술은 자신에 상황에 맞게 사용해야 되는 것 같습니다. (이점 꼭 유의하세요!!)
- 선행 학습
기본적으로 Swagger에 대해 모르시는 분들은 아래 링크를 통해 학습하고 오시는 걸 추천드리겠습니다.
[Swagger] Swagger UI를 활용한 내부 API Client 구축
[Swagger] Swagger UI를 활용한 내부 API Client 구축
- 개요 안녕하세요. 이번 글에서는 Swagger UI를 활용한 API 문서화 및 Client 서버 구축에 대해서 알아보겠습니다. 일단 Swagger라는 기술은 API를 설계하고 문서화를 해주는데 도움을 주는 기술입니다.
any-ting.tistory.com
Swagger UI를 활용해서 개별 클라이언트 서버를 구축하는 방식이 아닌 Express 환경에 Swagger를 연결하는 방식으로 진행하겠습니다.
Node Express API 서버를 구축하는 방법을 모르시는 분들은 아래 링크를 통해 학습하고 오시는 걸 추천드리겠습니다.
[Node.js] Express 서버 구축
- 개요 안녕하세요 이번 시간에는 Node.js 웹 애플리케이션 프레임워크인 Express를 활용해서 RESTful API 서버를 구축하는 시간을 가져보도록 해보겠습니다. 기본적으로 Node.js 서버를 PC에 설치를 해야
any-ting.tistory.com
- 설정
Express 서버와 Swagger를 연결하기 위해서는 두 가지 패키지가 필요합니다.
패키지 설치
npm install swagger-jsdoc swagger-ui-express --save-dev
- swagger-jsdoc : jsdoc주석으로 Swagger API 문서를 표현하기 위해 사용
- swagger-ui-express: swagger-ui와 express를 연결하기 위해 사용
Swagger 환경 설정
const swaggerUi = require("swagger-ui-express")
const swaggereJsdoc = require("swagger-jsdoc")

const options = {
  swaggerDefinition: {
    openapi: "3.0.0",
    info: {
      version: "1.0.0",
      title: "개발이 취미인 남자",
      description:
        "프로젝트 설명 Node.js Swaager swagger-jsdoc 방식 RestFul API 클라이언트 UI",
    },
    servers: [
      {
        url: "http://localhost:3000", // 요청 URL
      },
    ],
  },
  apis: ["./routers/*.js", "./routers/user/*.js"], //Swagger 파일 연동
}
const specs = swaggereJsdoc(options)

module.exports = { swaggerUi, specs }
swagger/swagger.js 파일 생성
환경 설정에서 중요한 부분은 apis 부분입니다.
우리가 실제 Express Router 파일과 Swagger 파일을 연결합니다.
기본 옵션을 다 설정하고 옵션을 index.js에서 연결을 해줍니다.
//express 모듈 불러오기
const express = require("express")
const api = require("./routers")

//express 사용
const app = express()

//Express 4.16.0버전 부터 body-parser의 일부 기능이 익스프레스에 내장 body-parser 연결
app.use(express.json())
app.use(express.urlencoded({ extended: true }))

app.use("/api", api)

const { swaggerUi, specs } = require("./swagger/swagger")

app.use("/api-docs", swaggerUi.serve, swaggerUi.setup(specs))

/**
 * 파라미터 변수 뜻
 * req : request 요청
 * res : response 응답
 */

/**
 * @path {GET} http://localhost:3000/
 * @description 요청 데이터 값이 없고 반환 값이 있는 GET Method
 */
app.get("/", (req, res) => {
  //Hello World 데이터 반환
  res.send("Hello World")
})

// http listen port 생성 서버 실행
app.listen(3000, () => console.log("개발이 취미인 남자 :)"))
app.use("/api-docs", swaggerUi.serve, swaggerUi.setup(specs)) 부분에서 UI와 옵션을 Express Router 환경에 연결합니다.
우리는 /api-docs 경로로 접속하면 아래와 같은 페이지가 보입니다.
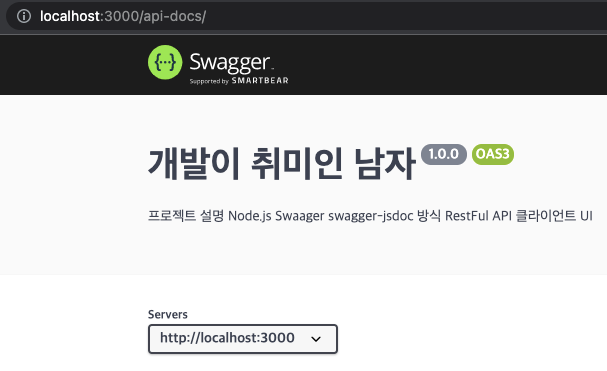
위와 같은 화면이 잘 보인다면 기본 설정을 성공했습니다. 그럼 이제 우리는 API 문서화를 진행해보겠습니다.
Routers 설정

프로젝트 구조는 위와 같습니다.
routers 폴더 아래 user api 정보를 만들어 보겠습니다.
routers 폴더 index.js 파일
const router = require("express").Router()
const user = require("./user")

/**
 * @swagger
 * tags:
 *   name: Users
 *   description: 유저 추가 수정 삭제 조회
 */
router.use("/user", user)

module.exports = router
주석 안에 @swagger 태그를 적용하면 해당 주석은 Swagger정보를 작성할 수 있습니다.

Users 태그가 생선 된 걸 알 수 있습니다.
user 폴더 indes.js 파일
const userRouter = require("express").Router()
const userController = require("./user.controller")

/**
 * @swagger
 * paths:
 *  /api/user/users:
 *    get:
 *      summary: "유저 데이터 전체조회"
 *      description: "서버에 데이터를 보내지 않고 Get방식으로 요청"
 *      tags: [Users]
 *      responses:
 *        "200":
 *          description: 전체 유저 정보
 *          content:
 *            application/json:
 *              schema:
 *                type: object
 *                properties:
 *                    ok:
 *                      type: boolean
 *                    users:
 *                      type: object
 *                      example:
 *                          [
 *                            { "id": 1, "name": "유저1" },
 *                            { "id": 2, "name": "유저2" },
 *                            { "id": 3, "name": "유저3" },
 *                          ]
 */
userRouter.get("/users", userController.getUsers)

/**
 * @swagger
 * /api/user/user?user_id={user_id}:
 *  get:
 *    summary: "특정 유저조회 Query 방식"
 *    description: "요청 경로에 값을 담아 서버에 보낸다."
 *    tags: [Users]
 *    parameters:
 *      - in: query
 *        name: user_id
 *        required: true
 *        description: 유저 아이디
 *        schema:
 *          type: string
 *    responses:
 *      "200":
 *        description: 사용자가 서버로 전달하는 값에 따라 결과 값은 다릅니다. (유저 조회)
 *        content:
 *          application/json:
 *            schema:
 *              type: object
 *              properties:
 *                ok:
 *                  type: boolean
 *                users:
 *                  type: object
 *                  example: [{ "id": 1, "name": "유저1" }]
 */
userRouter.get("/user", userController.findOneUser1)

/**
 * @swagger
 * /api/user/{user_id}:
 *  get:
 *    summary: "특정 유저조회 Path 방식"
 *    description: "요청 경로에 값을 담아 서버에 보낸다."
 *    tags: [Users]
 *    parameters:
 *      - in: path
 *        name: user_id
 *        required: true
 *        description: 유저 아이디
 *        schema:
 *          type: string
 *    responses:
 *      "200":
 *        description: 사용자가 서버로 전달하는 값에 따라 결과 값은 다릅니다. (유저 조회)
 *        content:
 *          application/json:
 *            schema:
 *              type: object
 *              properties:
 *                ok:
 *                  type: boolean
 *                users:
 *                  type: object
 *                  example: [{ "id": 1, "name": "유저1" }]
 */
userRouter.get("/:user_id", userController.findOneUser2)

/**
 * @swagger
 *
 * /api/user/add:
 *  post:
 *    summary: "유저 등록"
 *    description: "POST 방식으로 유저를 등록한다."
 *    tags: [Users]
 *    requestBody:
 *      description: 사용자가 서버로 전달하는 값에 따라 결과 값은 다릅니다. (유저 등록)
 *      required: true
 *      content:
 *        application/x-www-form-urlencoded:
 *          schema:
 *            type: object
 *            properties:
 *              id:
 *                type: integer
 *                description: "유저 고유아이디"
 *              name:
 *                type: string
 *                description: "유저 이름"
 */
userRouter.post("/add", userController.createUser)

/**
 * @swagger
 * /api/user/update:
 *   put:
 *    summary: "유저 수정"
 *    description: "PUT 방식을 통해 유저 수정(전체 데이터를 수정할 때 사용함)"
 *    tags: [Users]
 *    requestBody:
 *      description: 유저 수정
 *      required: true
 *      content:
 *        application/x-www-form-urlencoded:
 *          schema:
 *            type: object
 *            properties:
 *              id:
 *                type: int
 *                description: "유저 고유아이디"
 *              name:
 *                type: string
 *                description: "유저 이름"
 *    responses:
 *      "200":
 *        description: 사용자가 서버로 전달하는 값에 따라 결과 값은 다릅니다.(유저 수정)
 *        content:
 *          application/json:
 *            schema:
 *              type: object
 *              properties:
 *                ok:
 *                  type: boolean
 *                data:
 *                  type: string
 *                  example:
 *                    [
 *                      { "id": 1, "name": "유저1" },
 *                      { "id": 2, "name": "유저2" },
 *                      { "id": 3, "name": "유저3" },
 *                    ]
 */
userRouter.put("/update", userController.setUsers)

/**
 * @swagger
 * /api/user/update/{user_id}:
 *   patch:
 *    summary: "유저 수정"
 *    description: "Patch 방식을 통해 특정 유저 수정(단일 데이터를 수정할 때 사용함)"
 *    tags: [Users]
 *    parameters:
 *      - in: path
 *        name: user_id
 *        required: true
 *        description: 유저 아이디
 *        schema:
 *          type: string
 *    requestBody:
 *      description: 유저 수정
 *      required: true
 *      content:
 *        application/x-www-form-urlencoded:
 *          schema:
 *            type: object
 *            properties:
 *              name:
 *                type: string
 *                description: "유저 이름"
 *    responses:
 *      "200":
 *        description: 사용자가 서버로 전달하는 값에 따라 결과 값은 다릅니다. (유저 수정)
 *        content:
 *          application/json:
 *            schema:
 *              type: object
 *              properties:
 *                ok:
 *                  type: boolean
 *                data:
 *                  type: string
 *                  example:
 *                    [
 *                      { "id": 1, "name": "유저1" },
 *                      { "id": 2, "name": "유저2" },
 *                      { "id": 3, "name": "유저3" },
 *                    ]
 */
userRouter.patch("/update/:user_id", userController.setUser)

/**
 * @swagger
 * /api/user/delete:
 *   delete:
 *    summary: "특정 유저 삭제"
 *    description: "요청 경로에 값을 담아 서버에 보낸다."
 *    tags: [Users]
 *    parameters:
 *      - in: query
 *        name: user_id
 *        required: true
 *        description: 유저 아이디
 *        schema:
 *          type: string
 *    responses:
 *      "200":
 *        description: 사용자가 서버로 전달하는 값에 따라 결과 값은 다릅니다. (유저 삭제)
 *        content:
 *          application/json:
 *            schema:
 *              type: object
 *              properties:
 *                ok:
 *                  type: boolean
 *                users:
 *                  type: object
 *                  example:
 *                    [
 *                      { "id": 1, "name": "유저1" },
 *                      { "id": 2, "name": "유저2" },
 *                      { "id": 3, "name": "유저3" },
 *                    ]
 */
userRouter.delete("/delete", userController.delUser)

module.exports = userRouter
실제 router를 연결하는 부분에 Swagger 문서를 작성하기만 하면 문화는 완료됩니다.
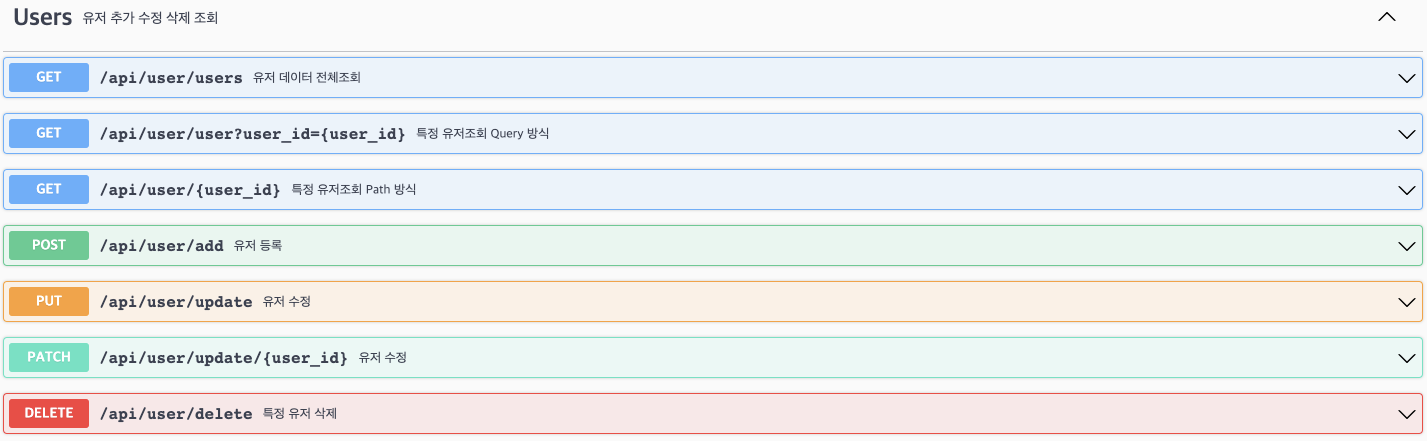
제대로 설정했다면 위와 같이 Swagger API 만들 수 있습니다.
여러분도 직접 작성해 구축해보는 걸 추천드리겠습니다.
이번 시간에는 Express API 서버에서 Swagger를 연결하는 시간을 가져봈습니다. 감사합니다 :)
- GitHub
swagger-jsdoc 브런치를 확인해주세요 :)
https://github.com/Ryan-Sin/Swagger-UI/tree/swagger-jsdoc
GitHub - Ryan-Sin/Swagger-UI
Contribute to Ryan-Sin/Swagger-UI development by creating an account on GitHub.
github.com
'백앤드(Back-End) > Swagger' 카테고리의 다른 글
| [Swagger] Swagger Yaml 파일 RESTFul API 클라이언트 구축 (0) | 2021.01.28 |
|---|---|
| [Swagger] Swagger Yaml 기본 파일 작성 (0) | 2021.01.12 |
| [Swagger] Swagger UI를 활용한 내부 API Client 구축 (0) | 2021.01.11 |


